POM Measurement Guide for Apparel: How to Spec a Garment That Fits (2026)
How to build a points of measure page that holds: where to measure, how to measure, grading across sizes, and tolerances that keep fit consistent.
Your sample came back, and the chest is an inch off. You measured it one way. The factory measured it another. Neither of you was wrong, because nobody agreed on where to put the tape. That gap is what a points of measure guide closes.
A POM measurement guide is the part of your tech pack that tells a factory exactly where to measure a garment and exactly how. Get it right and your sample matches your spec on the first round. Get it vague and you pay for it in fit samples, shipping, and weeks. This guide is the full build: what points of measure are, how to write each one, how to grade across sizes, and how to set tolerances that hold.
Table of Contents
- TL;DR: The POM measurement guide in five lines
- What is a point of measure (POM)?
- Why fit lives or dies on the POM page
- What goes on a POM page
- The columns every POM row needs
- How to measure: the methods you must specify
- The 6 steps to build a POM measurement guide
- POM codes and abbreviations every factory knows
- Tops vs bottoms: the points that change
- The old way vs a connected POM page
- Common POM mistakes and how to avoid them
- What to look for in a POM or tech pack tool
- How an accurate POM page affects cost and returns
- How Kampana builds the POM page inside a tech pack
- FAQ
- The bottom line
TL;DR: The POM measurement guide in five lines
- A point of measure (POM) is a defined spot on a garment where a specific measurement is taken, so the brand and factory measure the same thing the same way (Delogue).
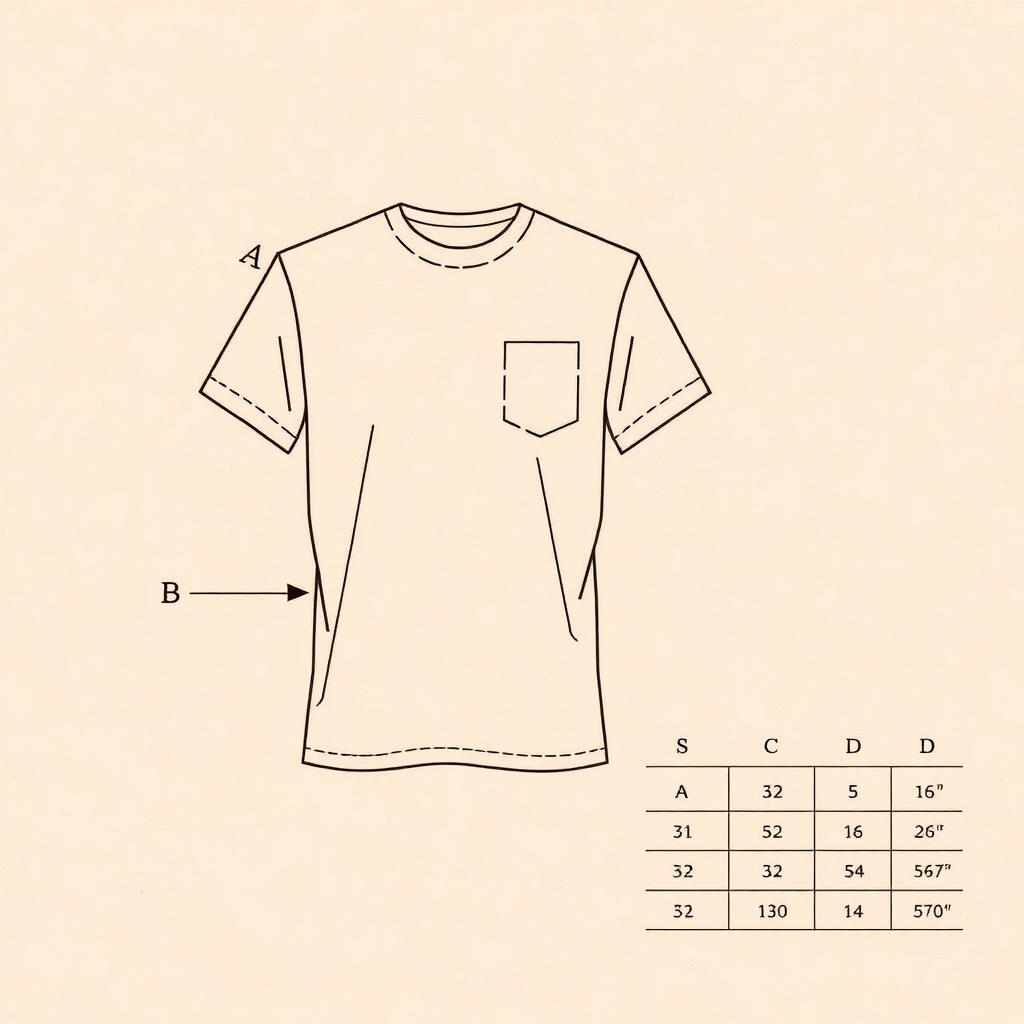
- The POM page combines a flat sketch with lettered arrows, a how-to-measure description for each point, and a graded measurement chart (Fashion Index).
- Each row needs a code, a name, the measurement method, the sample-size value, the graded values, and a tolerance.
- Tolerance is the plus-or-minus range you accept from the factory. Without it, every sample is a debate (Delogue).
- AI can draft the POM page from the product and reuse your point list. A human validates fit and grading. Map it to Kampana's technical design assist pack workflow.
What is a point of measure (POM)?
A point of measure is a defined location on a garment where a measurement is taken. Chest width, body length, sleeve length, neck opening. Each one names a spot, and the spec gives the value for that spot at every size (Delogue).
The reason POMs exist is agreement. A chest can be measured at the armhole, an inch below it, or across the fullest part. Three readings, three numbers, one garment. The POM removes the choice. It says measure here, this way, and reports back this number.
The POM page is one of the most precision-dependent parts of a tech pack. It serves as both a visual and an instructional guide, combining a flat sketch with annotated arrows and a measurement description for each point (Fashion Index). For the document it belongs to, see the fashion tech pack template.
Why fit lives or dies on the POM page
Fit is the most common reason a garment gets returned, and fit is decided on the POM page. If the measurements are clear, the sample matches. If they are vague, you fit-sample your way to the answer, paying for each round in time and freight.
Three reasons the POM page controls fit:
- It removes interpretation. A precise point and method give one reading, not a range. The factory cannot guess, so it cannot guess wrong.
- It travels. Your factory may be in another country and another language. A clear how-to-measure line and a lettered sketch carry the intent without a phone call (Fashion Index).
- It scales. A good POM page grades cleanly across sizes, so the medium that fits becomes a consistent small and large too.
A vague POM page is not a small flaw. It is an extra fit sample, a re-measure, and a fit that still drifts at the edges of the size range. The POM page is where you prevent all three, on one sheet.
What goes on a POM page
A complete POM page is more than a column of numbers. It is a small system with four parts that work together (Fashion Index).
| Part | What it is | Why it matters |
|---|---|---|
| POM sketch | A flat technical sketch with arrows at each measured point | Shows exactly where, visually |
| Measurement chart | The values for the sample size and every graded size | The numbers the factory hits |
| How-to-measure guide | A written description of how to take each point | Removes method ambiguity |
| Tolerances | The accepted plus-or-minus per point | Defines pass or fail |
Skip any one and the page leaks. A chart with no sketch leaves the factory guessing where. A sketch with no method leaves it guessing how. The four parts are not optional extras. They are the page.
The columns every POM row needs
A POM row is only useful if it carries enough to act on. A row that says "chest, 20 inches" tells a factory the number but not the point or the method. Here is the minimum each row should carry (Delogue).
| Column | What it captures | Example |
|---|---|---|
| POM code | A letter or number to reference the point | C |
| POM name | The standard name of the point | Across chest |
| How to measure | The method and reference points | 1 in below armhole, side to side |
| Type | Half measure, full measure, length | Half measure |
| Sample size value | The measurement at the base size | 20 in |
| Graded values | The value at each other size | S 19, L 21, XL 22 |
| Tolerance | Accepted plus-or-minus | +/- 0.5 in |
Codes are what tie the chart to the sketch and the how-to-measure guide. Assign a clear code to each point, then reference that same code everywhere (Delogue). The factory reads arrow C on the sketch, finds row C on the chart, and reads how to measure C in the guide.
How to measure: the methods you must specify
The number on the chart is meaningless without the method behind it. The same point measured flat and measured extended gives two different readings. Specify the method for every point (Fashion Index).
| Method | When to use it | Example point |
|---|---|---|
| Straight | Flat, linear points | Hem, bottom sweep |
| Curve | Curved seams | Armhole, princess seam |
| Half circumference | Points measured flat across, then halved by convention | Chest, waist on a laid-flat garment |
| Full circumference | Full round points | Collar, cuff opening |
| Flat | Stable, non-stretch areas | Shirt cuff |
| Extended | Stretch elements measured relaxed and pulled | Elastic waistband |
Knit and woven specs differ here. Woven specs are often taken as circumferences, while knit specs are usually taken laying flat (Delogue). Decide the convention for your garment and hold it across the whole page, so a half measure is always a half measure.
The 6 steps to build a POM measurement guide
Build the POM page in this order. Each step feeds the next.
Step 1: Pick your sample size and POM list
Choose the base size you will fit on, usually a medium for tops or a size in the middle of your range. Then list the points you will measure. Use the standard list for the garment type, no more and no fewer than the factory needs to build it right (Delogue).
Do not over-spec. Give the factory the points that control fit and leave room where the pattern should decide. A page crowded with redundant points is as hard to hit as one that is too thin.
Step 2: Sketch the garment and add arrows
Place a clean flat sketch of the garment on the page and draw an arrow at each measured point. Arrows should be clear and easy to follow, each tied to its POM code (Fashion Index). This is the visual half of the page, and it does the work no chart can: it shows where.
If you are working from a sketch and have not built the flats yet, start with the tech pack from a sketch workflow, then bring the flats here.
Step 3: Write each how-to-measure line
For every point, write a short, plain description of how to take it. Name the start point, the stop point, and the method. "Across chest: measure 1 inch below the armhole, side to side, half measure." That sentence is what makes the number repeatable (Delogue).
Use standard reference terms like high point shoulder, center front, and side seam, and use them the same way across the whole tech pack (Fashion Index). Consistent words prevent a factory from reading the same term two ways.
Step 4: Enter sample-size measurements
Measure your approved sample or pattern at each point and enter the real number at the base size. These are the anchor values that everything grades from, so take them from an actual garment or a finished pattern, not a guess (Onbrand).
Double-check the base size before you grade. An error here multiplies across every size in the run.
Step 5: Grade across the size range
Apply your grade rules to produce values for every other size. A grade rule sets how much each point grows or shrinks between sizes, and it is what makes a medium that fits become a consistent small, large, and extra-large (Delogue).
Grade per point, not by one blanket number. A chest and a neck do not grow at the same rate. Include both the sample-size and graded measurements on the chart so the factory sees how the sizes scale (Fashion Index).
Step 6: Set tolerances and fit comments
Give each point a tolerance, the plus-or-minus you will accept from the factory. It is written as a +/- against the spec, and the factory has to agree to it, so it is a two-way number, not a demand (Delogue). Tighter points like neck and collar get smaller tolerances. Forgiving points like body length can carry more.
Close with fit comments: any construction or fit notes that the numbers alone do not carry (Fashion Index). This is where you flag intent, like "slim through the waist" or "drop shoulder by design."
POM codes and abbreviations every factory knows
POMs run on a shared shorthand. Using the standard abbreviations keeps your page readable to any factory (Fashion Index).
| Abbreviation | Meaning |
|---|---|
| HPS | High point shoulder |
| CF | Center front |
| CB | Center back |
| SS | Side seam |
| AH | Armhole |
Many measurements reference the high point shoulder as their anchor, because it is a fixed, findable spot. "10 inches down from HPS" gives a factory a precise place to start the tape (Delogue). Build your how-to-measure lines on these anchors and your page reads the same in any language.
Tops vs bottoms: the points that change
The method holds across garments, but the point list changes by category. Knowing the common points for each saves you from a thin spec.
For tops, the core points include high point shoulder, neck opening, shoulder drop, armhole, bicep, sleeve length, across chest, waist, hip, bottom sweep, center back, center front, body length, and side seam (Delogue).
For bottoms, the core points include upper waist, lower hip, front rise, back rise, thigh, knee, leg opening, and inseam (Delogue).
| Category | Fit-critical points | Common miss |
|---|---|---|
| Tops | Across chest, armhole, neck opening, body length | Skipping shoulder drop |
| Bottoms | Waist, rise, thigh, inseam, leg opening | Skipping front vs back rise |
A pant spec that lists one rise instead of front and back rise will fit wrong at the crotch. List the points the category needs, then measure each the same way every size.
The old way vs a connected POM page
Most POM pages are built by hand in a spreadsheet, retyped from the last style. That is how points drift, codes stop matching the sketch, and grading errors slip through.
| Old way | Connected way | |
|---|---|---|
| Point list | Retyped per style | Reused from a library |
| Sketch and chart | Built in separate files | Tied together by code |
| Grading | Manual, error-prone | Applied by rule per point |
| Tolerances | Often missing | Set per point as a field |
| How-to-measure | Copied, sometimes stale | Standardized terms |
| Sign-off | Scattered | One approval gate |
A connected POM page keeps the sketch, the chart, and the how-to-measure guide pointing at the same codes, so a change in one updates the others instead of leaving them out of sync.
Common POM mistakes and how to avoid them
Numbers with no method
A chart of values with no how-to-measure guide is the most common POM failure. The factory measures its own way, and the sample drifts. Fix it by writing a method line for every point, every time (Delogue).
Codes that do not match the sketch
When the chart says C but the arrow says 3, the factory stops to ask. Fix it by assigning one code per point and using that same code on the sketch, the chart, and the guide (Fashion Index).
No tolerances
Without a tolerance, every deviation becomes a negotiation after the sample arrives. Fix it by setting a +/- per point up front and confirming the factory accepts it (Delogue).
Over-speccing the garment
Too many points is its own failure. It crowds the page and removes the room a factory needs to balance fit. Fix it by giving only the specs needed to make the garment (Delogue).
What to look for in a POM or tech pack tool
When you choose a tool to build POM pages, look for the things that prevent drift:
- A sketch and chart that share codes, so they cannot fall out of sync.
- A reusable point library, so a t-shirt POM list does not get retyped each season.
- Per-point grading by rule, not one blanket grade.
- Tolerance as a structured field, not a note in the margin.
- A fit-history view, so actual sample measurements can be logged against the spec and checked within tolerance (Techpacker).
- One approval step before the page ships.
The goal is a page where the parts stay tied together and the point list carries forward, so each new style starts from your standard, not a blank sheet.
How an accurate POM page affects cost and returns
The POM page is a small document with a large reach. It touches sampling cost, time to market, and returns, because all three trace back to fit.
A precise POM page cuts the number of fit samples. Every avoided round is freight saved and a week kept. It also protects the customer experience: a consistent fit across the size range means fewer size-driven returns, which are among the most common in apparel (Onbrand).
The page also feeds the rest of the tech pack. It connects to the graded spec sheet, the BOM, and quality control, where each sample is checked point by point against the spec and its tolerance (Techpacker). Get the POM page right and the documents downstream inherit the accuracy.
How Kampana builds the POM page inside a tech pack
Kampana is an AI product creation OS for fashion brands. It turns one product into design, 3D renders, tech packs, PDP imagery, B2B sell-in kits, marketplace feeds, and social campaigns, on a node-based canvas with approval gates and product-fidelity QA. The POM page lives inside the technical design assist pack, drafted from the product instead of a blank chart.
You drop the product on the canvas, and Kampana drafts a starting POM page: the flat sketch, a standard point list for the garment type, codes tied to arrows, and a graded chart for your technical designer to validate.
What you get
- A drafted POM page with a coded flat sketch and a measurement chart.
- A reusable point list carried across styles and seasons.
- Per-point grading you adjust by rule.
- Tolerance as a field on every row.
- A how-to-measure guide built on standard terms.
- A human approval gate and product-fidelity QA before the page ships.
The old way vs Kampana
| Old way | With Kampana | |
|---|---|---|
| Point list | Retyped per style | Reused from a library |
| Sketch and chart | Separate files | Tied by shared codes |
| Grading | Manual per cell | Applied by rule |
| Tolerance | Often missing | A structured field |
| Reconciliation | Drifts from the flats | Tied to the product |
| Sign-off | Scattered | One approval gate, product-fidelity QA |
How it works
- Drop one product on the canvas.
- Wire it to the technical design assist pack node.
- Review the drafted POM sketch, chart, and how-to-measure lines.
- Validate fit, grading, and tolerances as the technical designer.
- Approve at the human gate.
- Export the POM page with the full tech pack and carry the fit into your line plan.
Pricing is credit-based. You draw from one shared credit pool, with no seats and no subscription, and credits do not expire. There is a free starter pack to build your first tech pack, and an assist pack draws a modest credit range because it is mostly structure and QA. See current ranges on Kampana pricing.
AI will not replace your technical designer. It gives them a starting POM page so they validate fit and grading instead of retyping a chart. Want the whole document? Start with the technical design assist pack or see the end-to-end collection launch.
FAQ
What does POM stand for in fashion?
POM stands for point of measure. It is a defined location on a garment where a specific measurement is taken, so the brand and the factory measure the same spot the same way (Delogue). Each POM has a code, a name, a method, and a value per size.
What is the difference between a POM and a spec sheet?
The spec sheet is the chart of measurements by size. The POM page is the larger system that makes those numbers usable: the flat sketch with arrows, the graded chart, and the how-to-measure guide (Fashion Index). The spec sheet is one part of the POM page.
What is tolerance in a POM page?
Tolerance is the acceptable plus-or-minus from the spec at each point. It is written as a +/- and the factory must agree to it, so it is a shared number rather than a one-way demand (Delogue). Tighter points like collars get smaller tolerances.
What is a how-to-measure guide?
It is the visual and written guide that shows how to take each point, using sketches, arrows, and POM codes (Delogue). It pairs with the measurement chart so the factory knows not just the number but the method behind it.
How many points of measure should a garment have?
Enough to control fit and no more. Give the factory only the specs needed to make the garment, leaving room to balance fit, weight, and pattern (Delogue). A simple tee needs fewer points than a tailored jacket.
What does HPS mean in a measurement guide?
HPS means high point shoulder, the highest point of the shoulder where the shoulder seam meets the neckline. It is a common anchor for vertical measurements like body length and waist placement (Delogue).
Can AI write a POM page?
AI can draft the POM page from the product: the flat sketch, a standard point list, codes, and a graded chart. A technical designer then validates fit, grading, and tolerances. Kampana drafts the page inside the technical design assist pack with a human approval gate.
Do knit and woven garments measure differently?
Yes. Woven specs are often taken as circumferences, while knit specs are usually taken laying flat (Delogue). Pick the convention for your garment and apply it consistently so a half measure always means the same thing.
The bottom line
A POM measurement guide is not a chart of numbers. It is the agreement that lets a brand and a factory measure the same garment the same way. The sketch shows where, the method shows how, the chart shows the value, and the tolerance shows the range. Miss any one and fit drifts.
Build the page once, build it right, and reuse the point list season after season. That is how a medium that fits becomes a clean size run, and how a sample matches your spec on the first round instead of the third.
You do not have to start from a blank chart. Drop the product on the canvas and let Kampana draft the POM page, then validate it. Turn a sketch into a technical design assist pack or start creating, free.
Send one product URL. Kampana turns it into a mini campaign pack.